Help
Help pages provide instructions on how to use FREECORP™. The help pages include both explanation on how the corrosion rate is calculated in the model and how to use the graphical interface to calculate corrosion rate and explore the results.
Installation
Once FREECORP™ has been downloaded, extract the contents of the zip file to a location of your choosing.

Installation version will make sure all prerequisites such as Microsoft’s .Net Framework are installed prior to FREECORP™ running but may require administrative rights for installation.
Installation Wizard
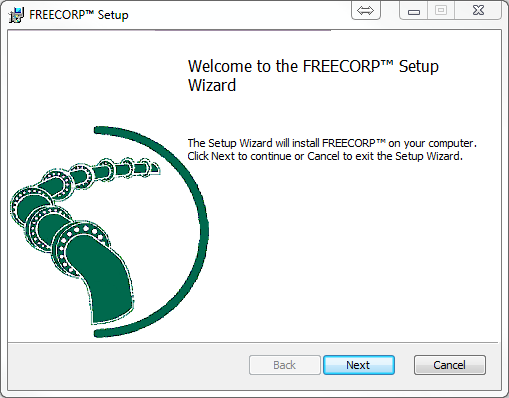
- Begin the installtion
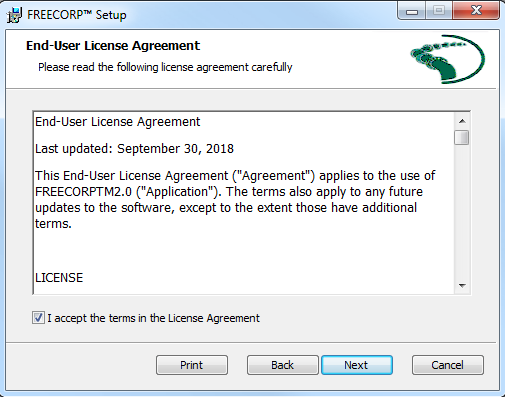
- Please accept the license agreement before proceeding.
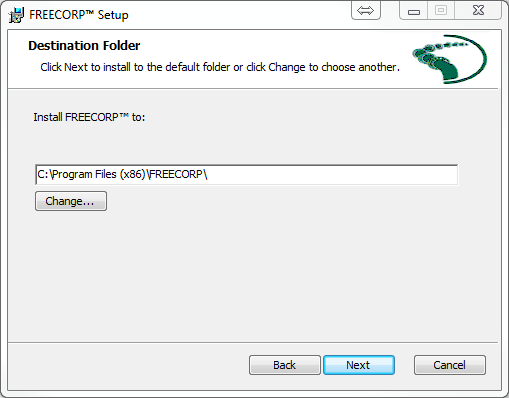
- You may choose a different folder to copy the application.
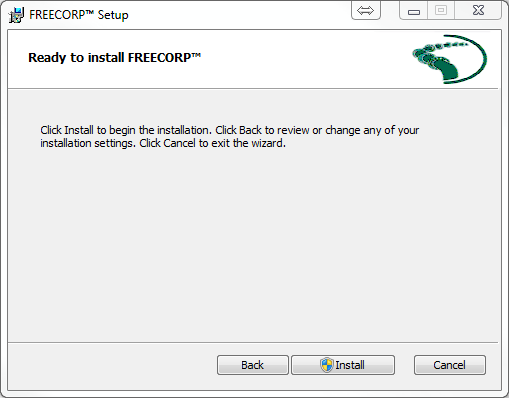
- Confirm to proceeed with installation.
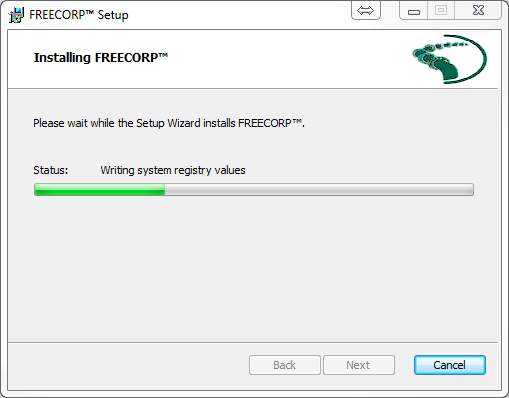
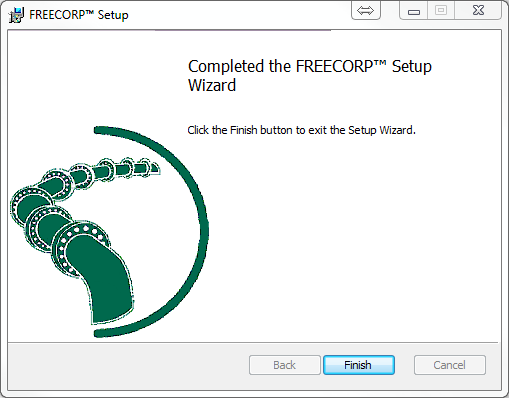
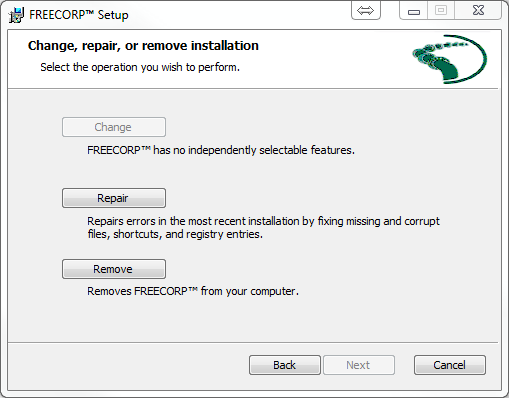
After successfully installing and running the program please run FREECORP™ to trigger registration process (see Registration). However, you may not need to register again if you already did so. The same installer can be used for repairing and removing FREECORP™ from the machine the application is installed.
Registration
FREECORP™ is a freeware, which can be used freely for unlimited period after a one time registration is performed. This way the downloaded copy of FREECORP™ is registered for a specific user on a specific workstation, or laptop. Please follow the following steps to register your copy of FREECORP™ after installation.
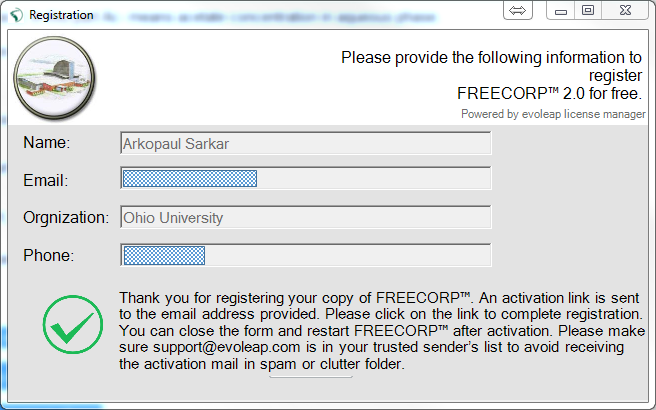
- The following registration form is displayed for the first time FREECORP™ is run on a computer, where the userdidn’t register FREECORP™ previously.
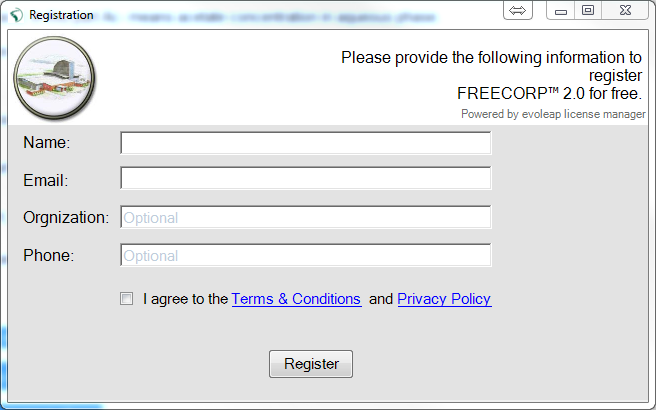
- Please click on register button after completing the form and checking the Terms & Condition agreement. A valid email address must be provided in order to receive the activation mail.
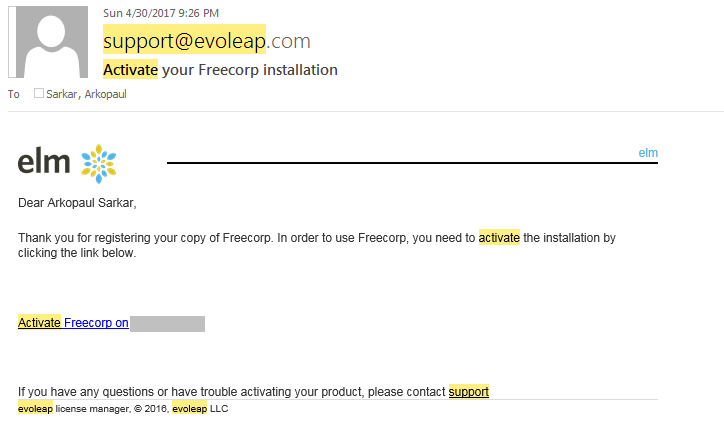
- Please go to your email account used during registration. An activation mail should arrive from support@evoleap.com. Please click on the activation link to activate your free copy of FREECORP™.
User Interface
The user interface of FREECORP™ is built closely following Microsoft Office’s ribbon style [8].The interface is separated in four resizable areas, such as, ribbon area (top), process area (left), data area (middle) and trace area (bottom). Ribbon area contains buttons, which triggers generic actions on Multicorp models. Every time a new tab is selected buttons are changed depending on the tab content. Process area shows the steps to create a corrosion model and also displays the status of every model. Data area displays parameters in groups, charts, tables and various other output elements. In the end trace area displays vital messages including warning and errors at the time of corrosion modeling.
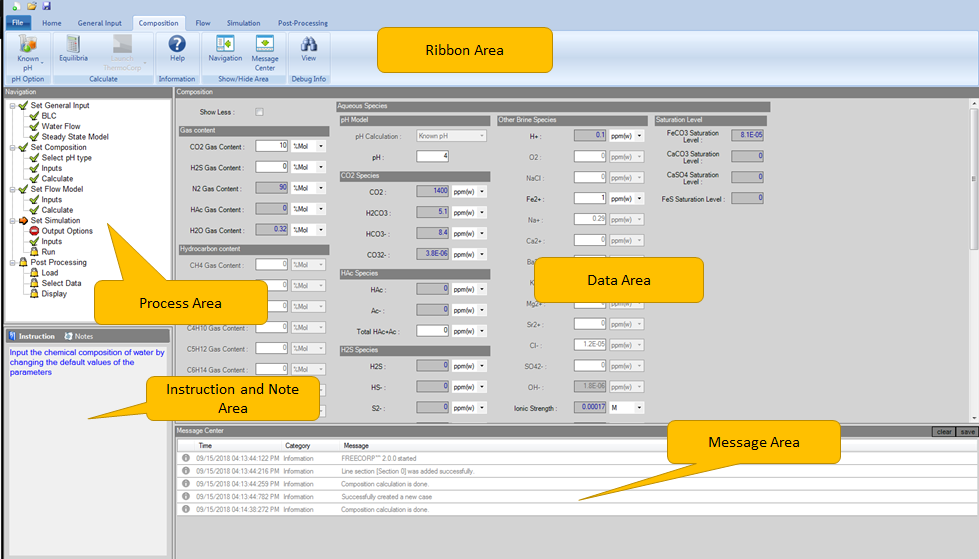
These areas are:
- Ribbon Area - The top menu bar that contains tabs as well as data panel specific buttons based on tab selected.
- Data Area - The main data area where all variables will be shown dependent upon tab selected.
- Process Area - The process state area where progress of the corrosion prediction process is shown.
- Instruction and Notes Area - The instruction and notes area that gives step by step instruction as well as user based notes dependent upon ribbon area tab chosen.
- Message Center - The messaging center that shows processing events as they happen and gives potential errors and warnings.
Process Area Icon Breakdown
The process tree has five different icons to represent different states of each process. In order for FREECORP™ to work, these processes must be done in order from top to bottom of the process tree.

File Save and Load
FREECORP™ saves all input data in an XML document of type .mcinput, which follows the same node hierarchy as in default XML document and but stores only current values for individual parameters. As many non-changeable attributes of the parameters are always found from default XML document, .mcinput file doesn’t store that information, resulting in much smaller file size.
Along with .mcinput, FREECORP™ also saves simulation data and some temporary files along its process.
.fcorp - This is a zip file which contains other FREECORP™ files. This file type also gets associated with FREECORP™ application, so that it shows the application icon for files stored in user’s hard disk.
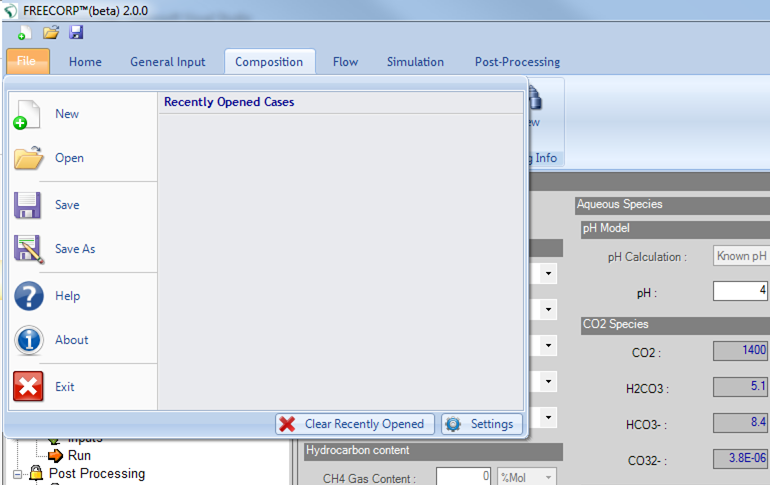
Everytime FREECORP™ is launched, a new case is created with default values. The case can be saved at any point by clicking on either the save menu item in the File menu, or quick launch icon.
Similarly, an existing .fcorp file can be loaded at any point by clicking on either the Open menu item in the File menu, or quick launch icon.
User Input
Different types of inputs are used in FREECORP™ to both take input from user and display calculated values.
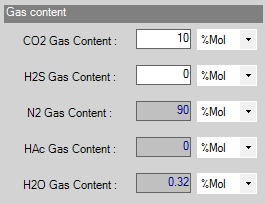
These inputs are normally grouped under parameter groups, e.g. the param group called ‘Gas content’ contains two parameters (CO2 Gas Content and H2S Gas Content), which are input parameters, and three parameters (N2 Gas Content, HAc Gas Content, H2O Gas Content), which are output parameters.
Some parameters in FREECORP™ are not avaliable in the current release. These parameters are displayed as greyed-out.
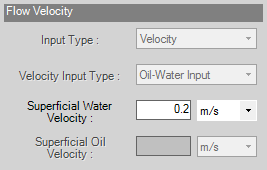
Every parameter also has a tool tip box which appears when the cursor is hovered on the parameter name.
Types of Inputs

- parameter Most of the input and output values are displayed as parameter. Each parameter contains the parameter name, a text box which can receive/display a value, and a drop-down list with available units to select from. The default units have been preselected for all parameters with units. However, any value can be converted to a different unit, which may be selected from the available units in the drop-down list/menu.

- Option Parameter Option parameters let user choose a value from the drop-down list provided.

- Checkbox Parameter Checkbox parameters let users choose a binary option (yes/no) by checking the box provided.
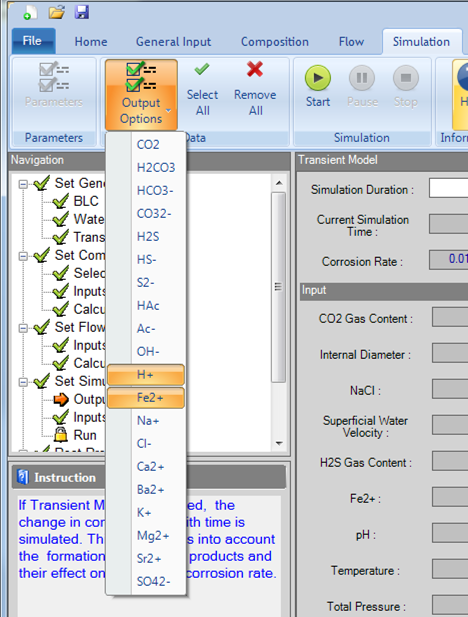
- Output Options Output Options is a list of species which is available for Transient simulation as a ribbon button. This control lets user select and deselect items. The Select All or Remove All buttons can be used to select or deselect the entire list with one click.
Simulation and Analysis
FREECORP™ offers two types of corrosion simulations. One of these models needs to be selected in the General Input tab. Based on the simulation type chosen in the General Input tab the Data Area for simulation tab will change.
- Transient Model - Transient electrochemical model for steel corrosion with growth of the corrosion product layer.
- Steady State Model - Steady State model for bare steel corrosion in the absence of a corrosion product layer.
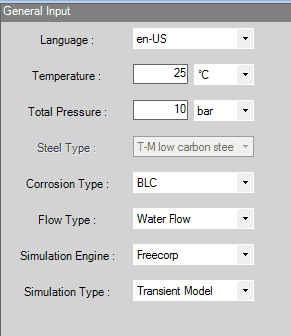
Currently FREECORP™ supports only Bottom of the Line (BLC) corrosion and Water Flow for Flow Type. This configuration refers to corrosion which happens at the bottom of the pipeline because of exposure to the water phase.
How to perform a simulation and analyze the prediction result?
Once the input values are set correctly, the simulation can be started by clicking on the Start button in the simulation tab. Inputs from other tabs are also displayed. They can only be edited in the corresponding tab the parameter belongs to. Transient models may require a long time to complete in case large duration is chosen. However, any running simulation can be stopped at any point by clicking on the Stop button.
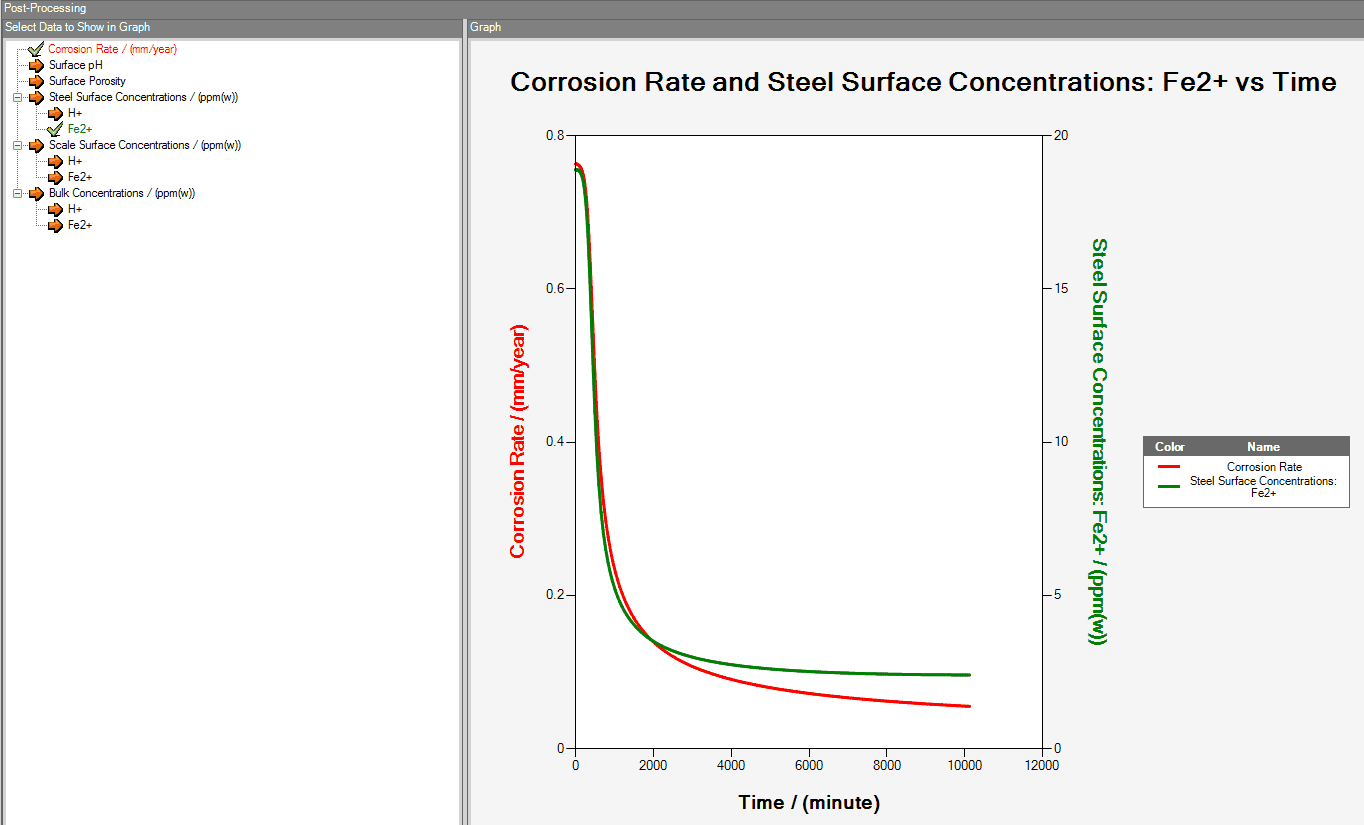
After the simulation has finished, you can choose which simulation results to display in the post processing graph. This is done by right-clicking onto the data in the ‘Select Data to Show in Graph’ window and choosing the axis onto which they will be plotted. Once the data has been chosen for both the X-Axis and Primary Y-Axis, they will automatically be displayed on the graph. FREECORP™ can plot data in multiple Y Axes (Primary and Secondary Y-Axis) allowing a multiple scale representation. Once the selected data has been plotted, right-clicking anywhere on the graph area will display this menu:

Thus allowing the user to:
- show or hide the chart’s legend
- export graph data to comma separated values file (Excel compliant)
- save the graph as a PNG image
- reset the zoom all the way out
Depending upon the simulation type chosen in General Input, the post processing data area will change.
Transient Model
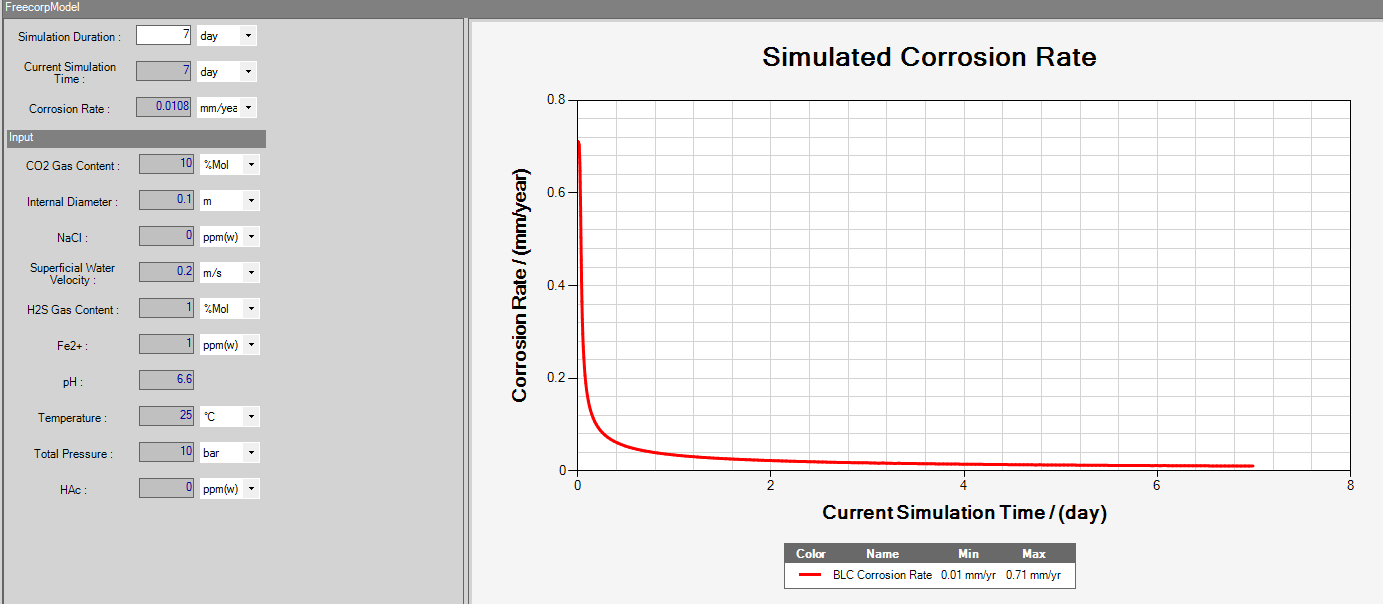
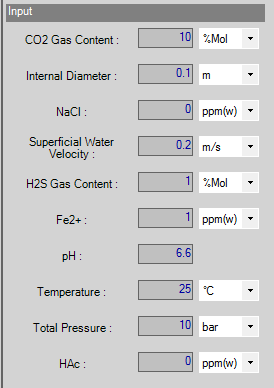
Simulation Duration is the duration of simulation for each corrosion rate prediction case.
Corrosion Rate displays the current corrosion rate predicted at the time shown in Current
Simulation Time. This Corrosion Rate is plotted live against simulation time as simulation
calculation progresses. ‘Output Options’ is a ribbon button in the ‘Simulation’ tab,
including a list of species available for Transient simulation. In the the post-processing tab,
the concentration is shown only for those species selected from the ‘Output Options’ drop-down list.
Steady State Model
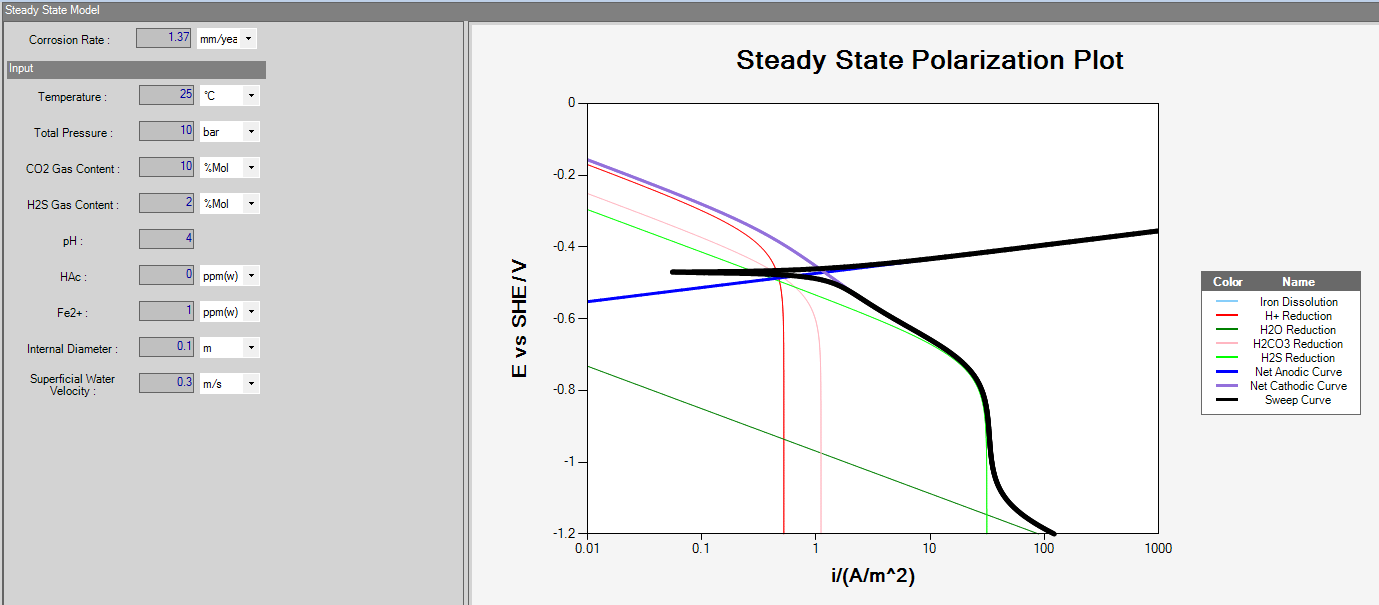
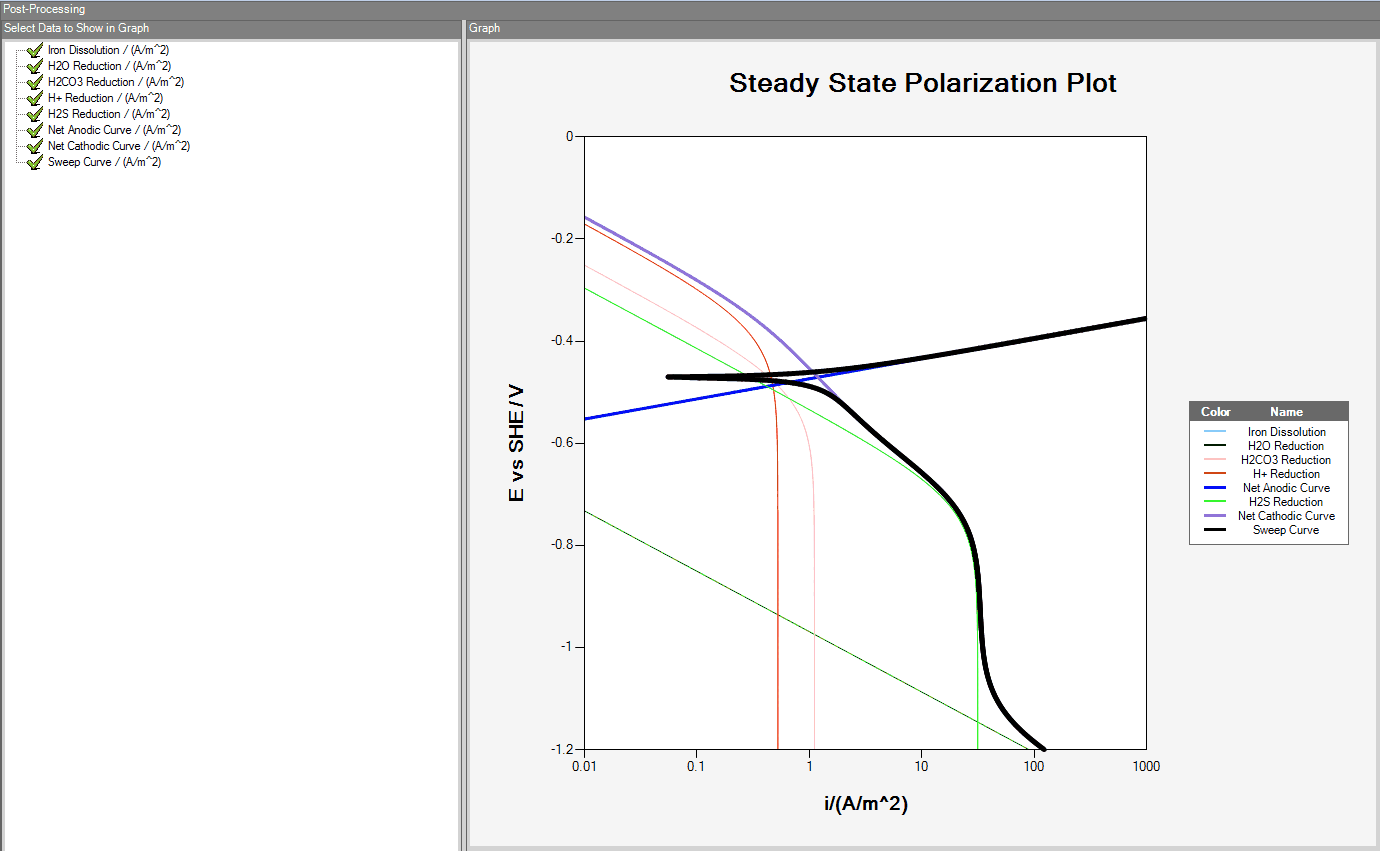
The Steady State model simulation graph displays all polarization curves, relating potential with current density, for each individual electrochemical reaction involved in the corrosion process. In addition, the total anodic and cathodic polarization curves are depicted, along with the sweep polarization curve of the electrochemical system. In the post-processing tab, these curves can be added or removed from the plot by selecting and deselecting the appropriate check box found in the ‘Select data to show’ window on right click on each curve.
How to run simulations by using FREECORP™ API?
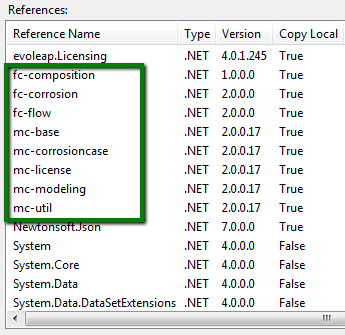
FREECORP™ APIs are distributed in two core .net DLL files (fc-modeling.dll, fc-base.dll, fc-util.dll),
and several model specific DLLs such as fc-composition.dll for chemistry related models, fc-flow.dll for
flow related models. The FREECORP™ simualation models are contained in the fc-corrosion dll.
It is possible to write a .Net (either in C# or vb.Net) program and the FREECORP™ APIs to perform
most of the operations available in the gui of the software.
Project Setup
Apart from the necessary DLLs, a .Net project also needs nuget packages, some properties, public key files as well as some special build configurations. Please follow the guidelines below and the sample project, which may be downloaded from download Libraries page.
- Reference necessary DLLs in your .net project. Note that both C# and VB.net project can reference these DLLs. However, only vb.net project is used as demo. C# projects will be very similar.
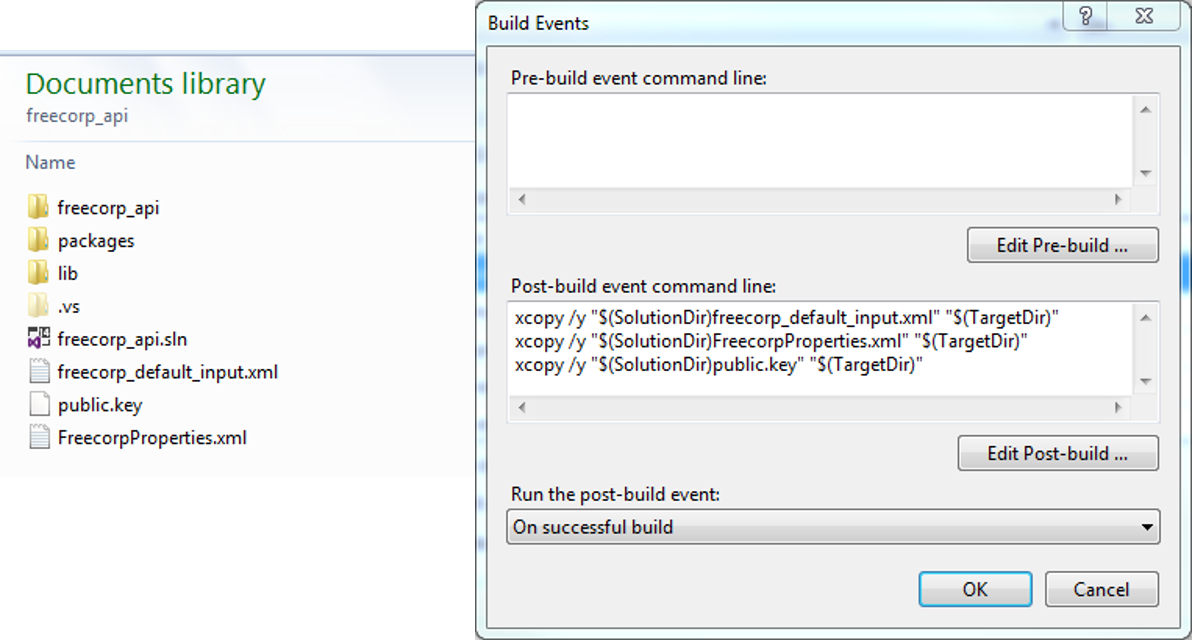
- Two configuration files: multicorpdefaultinput.xml and MulticorpProperties.xml, and a public key file need to be present in the target folder of the .net project. Easiest way to make sure they are available in the target folder after every build is to store them in the project folder and then write a ‘build event’ to copy them to target folder after every build.
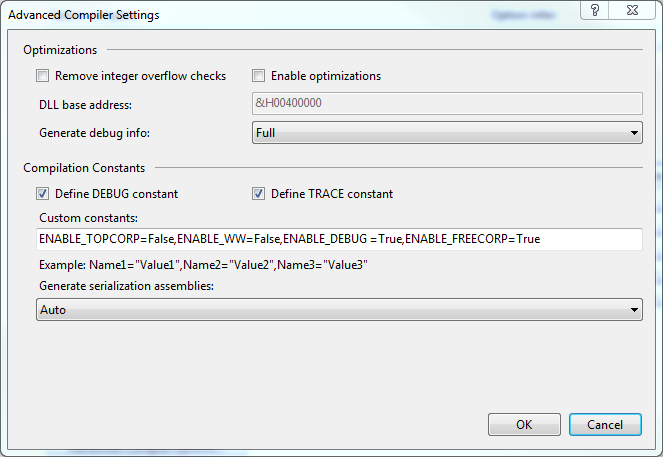
- It is also manadatory to put the following compile options, especially the custom constant settings in order to select the right product to build.
Workflow of a typical case
Initialize License, configuration and settings
If AbstractModel.licenseValid Then
   MulticorpRunner.initialize()
End If
Create a new Case
Dim caseFactory As CaseFactory = AbstractModelFactory_
.getFactory(AbstractModelFactory.AbstractModels.CORROSIONCASE)
Dim cCase As AbstractCase = caseFactory.createModel()
cCase.readDefaultValue()
Choose corrosion type
CType(cCase.getParameter(NameList.CORROSION_TYPE), OptionParameter)_
.setValue(AbstractCase.CorrosionPosition.BLC)
cCase.onCorrosionTypeChanged()
Choose flow type
CType(cCase.getParameter(NameList.FLOW_TYPE), OptionParameter)_
.setValue(FlowModel.FlowType.FREE_FLOW)
cCase.onFlowTypeChanged()
Choose simulation type
'Set simulation Engine
CType(cCase.getParameter(NameList.SIMULATION_ENGINE), OptionParameter)_
.setValue(CorrosionModel.SimulationEngine.Freecorp)
cCase.onSimulationEngineChanged()
'Set simulation Type as transient
CType(cCase.getParameter(NameList.SIMU_TYPE), OptionParameter)_
.setValue(CorrosionModel.SimulationModelType.FreeCorp_Transient)
cCase.onSimulationTypeChanged()
'Set simulation Type as steady state
CType(cCase.getParameter(NameList.SIMU_TYPE), OptionParameter)_
.setValue(CorrosionModel.SimulationModelType.FreeCorp_Steady_State)
cCase.onSimulationTypeChanged()
Set input parameter values
The format for calling APIs to set a value to an input parameter is as follows: get the model object from case
by method getModel; get the parameter object from the model object by method getParameter (the parameter name
in the argument should be same as displayed on the UI); and then input the value in the Parameter object by
method setValue. The parameter should be set in the model which contains it, as shown in the sample code below.
For example, TEMPERATURE and Total Pressure is in CorrosionCase model, CO2GASCONTENT, pH and WATERSPECHAC is in CompositionModel,
and SECTIONDIAMETER, SUPERFICIALWATER_VELOCITY is in Flow model. The models can be retrieved from the case by their model type after they
are initialized.
The input value should be in the base unit of the particular parameter. Every parameter has a unit type and
every unit type has a base unit, which is given in the table below. The base unit is used as default unit in which the value needs to be supplied.
However, FREECORP™ provides unit conversion tools which are described in next section.
Dim simulation As AbstractModel = cCase.getModel(NameList.MODEL_NAME_CORROSION_MODEL)
cCase.getParameter(NameList.TEMPERATURE).setValue(80)
cCase.getParameter(NameList.TOTAL_PRESSURE).setValue(10)
cCase.getmodel(NameList.MODEL_TYPE_CHEMISTRY_MODEL).getParameter(NameList.CO2_GAS_CONTENT).setValue(0.1)
cCase.getmodel(NameList.MODEL_TYPE_CHEMISTRY_MODEL).getParameter(NameList.H2S_GAS_CONTENT).setValue(0.001)
cCase.getmodel(NameList.MODEL_TYPE_CHEMISTRY_MODEL).getParameter(NameList.WATER_SPEC_HAC).setValue(0)
cCase.getmodel(NameList.MODEL_TYPE_CHEMISTRY_MODEL).getParameter(NameList.PH).setValue(4)
cCase.getmodel(NameList.MODEL_TYPE_CHEMISTRY_MODEL).getParameter(NameList.WATER_SPEC_FE2).setValue(10)
cCase.getmodel(NameList.MODEL_TYPE_CHEMISTRY_MODEL).getParameter(NameList.WATER_SPEC_NACL).setValue(10000)
simulation.getParameter(NameList.SIMU_DURATION).setValue(7 * 24)
cCase.getModel(NameList.MODEL_TYPE_FLOW_MODEL).getParameter(NameList.SECTION_DIAMETER).setValue(0.1)
cCase.getModel(NameList.MODEL_TYPE_FLOW_MODEL).getParameter(NameList.SUPERFICIAL_WATER_VELOCITY).setValue(0.2)| Parameter | Base Unit |
|---|---|
| Temperature | Centigrade |
| Total Pressure | Bar |
| CO2 Gas Content | Bar |
| H2S Gas Content | Bar |
| N2 Gas Content | Bar |
| HAc Gas Content | Bar |
| H2O Gas Content | Bar |
| CH4 Gas Content | Bar |
| C2H6 Gas Content | Bar |
| C3H8 Gas Content | Bar |
| C4H10 Gas Content | Bar |
| C5H12 Gas Content | Bar |
| C6H14 Gas Content | Bar |
| C7H16 Gas Content | Bar |
| C8H18 Gas Content | Bar |
| pH | |
| CO2 | PPM(W) |
| H2CO3 | PPM(W) |
| HCO3- | PPM(W) |
| CO32- | PPM(W) |
| HAc | PPM(W) |
| Ac- | PPM(W) |
| Total HAc+Ac | PPM(W) |
| H2S | PPM(W) |
| HS- | PPM(W) |
| S2- | PPM(W) |
| H2S+HS+S | PPM(W) |
| H+ | PPM(W) |
| Fe2+ | PPM(W) |
| Na+ | PPM(W) |
| Ca2+ | PPM(W) |
| Ba2+ | PPM(W) |
| K+ | PPM(W) |
| Mg2+ | PPM(W) |
| Sr2+ | PPM(W) |
| Cl- | PPM(W) |
| SO42- | PPM(W) |
| OH- | PPM(W) |
| Ionic Strength | Meter |
| Alkalinity | Meter |
| FeCO3 Saturation Level | |
| CaCO3 Saturation Level | |
| CaSO4 Saturation Level | |
| FeS Saturation Level | |
| Superficial Water Velocity | Meter/Second |
| Section Diameter | Meter |
| Simulation Duration | Hour |
Read parameter values
Once parameter object is retrieved in the same way an Input parameter object is retrieved (described above), the value
of the Parameter can be retrieved by method getValue(). FREECORP™ provides unit conversion. The output value of a
parameter can be retrieved in base unit by method getValue(). The value can be converted to another unit from
same unit type by method getViewValue()
Dim totalPressure As Parameter = CType(cCase.getParameter(NameList.TOTAL_PRESSURE), Parameter)
Console.WriteLine("Value of total pressure in Bar = " + totalPressure.getViewValue(util.units.Unit.BAR))
Perform simulation
Before simulation is performed, the CompositionModel need to be calculated
cCase.getmodel(NameList.MODEL_TYPE_CHEMISTRY_MODEL).calculating()
If Not simulation Is Nothing Then
   If CType(simulation, CorrosionModel).isCorrosionPossible() Then
        If CType(simulation, CorrosionModel).prepareSimulation() Then
           CType(simulation, CorrosionModel).simulate()
        End If
   End If
End If
Retrieve simulation results
-
Transient model
Dim corrosionResult As CorrosionResult = CorrosionResultManager.getInstance() If corrosionResult.hasData() Then Dim crSeries As Series = CType(corrosionResult, SinglePointModelResult).getCorrosionRate() Console.WriteLine("Corrosion rate over time -->" + vbNewLine + crSeries.generateCSVContent) ' 0 for bulk, 1 for bulk surface, 2 for steel surface concentration of species Dim concFe2PlusSurface As Series = CType(corrosionResult, SinglePointModelResult)_ .getConcentrationOnLayer(2, "Fe2+") Console.WriteLine("Surface concentration of Fe2+ over time --> "_ + vbNewLine + concFe2PlusSurface.generateCSVContent) End If -
Steady State model
Dim h2oredux As Series = corrosionResult_
.getDataset(NameList.STEADYSTATE_OPTION_NODE_H2O_REDUCTION, 0, 1)
Console.WriteLine("H2O Reduction over time -->" + vbNewLine + h2oredux.generateCSVContent)
